The load agents which are spun in your AWS environment have no access to other AWS resources, by default they only have access to standard protocols limited to the VPC environment in which they are launched. Short version – your load agents are limited to making HTTP(s) requests to services. We will walk through attaching an AWS Instance Profile to a load agent.
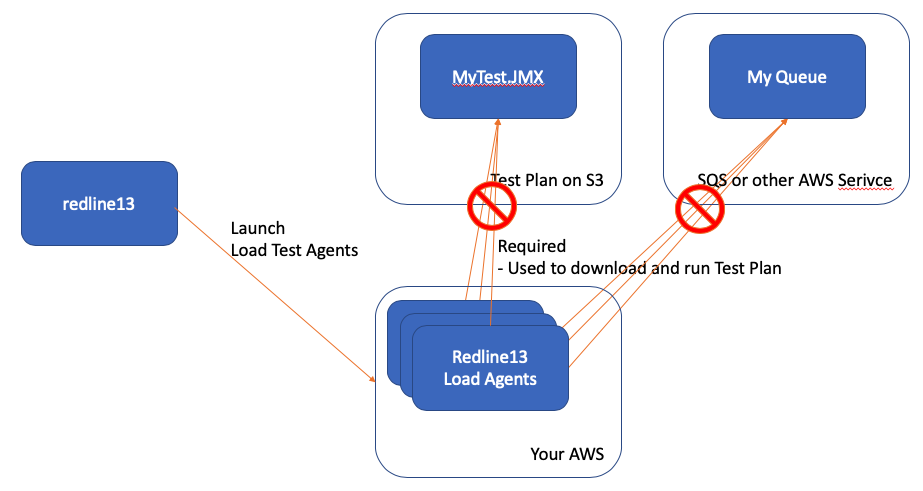
There are times you might want your load agents to access other AWS resources directly
– S3 – To download or upload files or even access the test plan itself
– SQS – To send or read messages from a queue, a typical way to trigger load.
To allow your load agent to access specific resources you can use an IAM Instance Profile, thus attaching an AWS Instance Profile to a load agent. You can read all the AWS documentation on this over here.
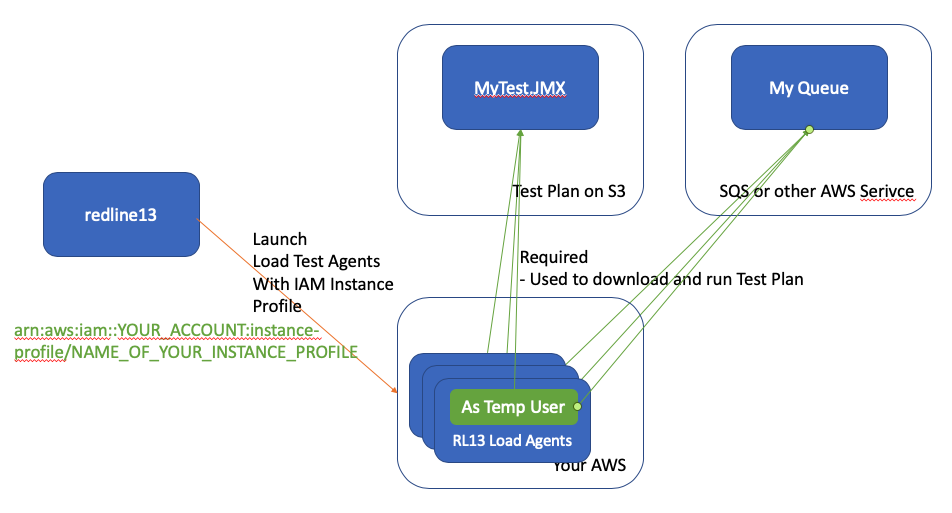
Here are the steps to associate an IAM Instance Profile with your load test
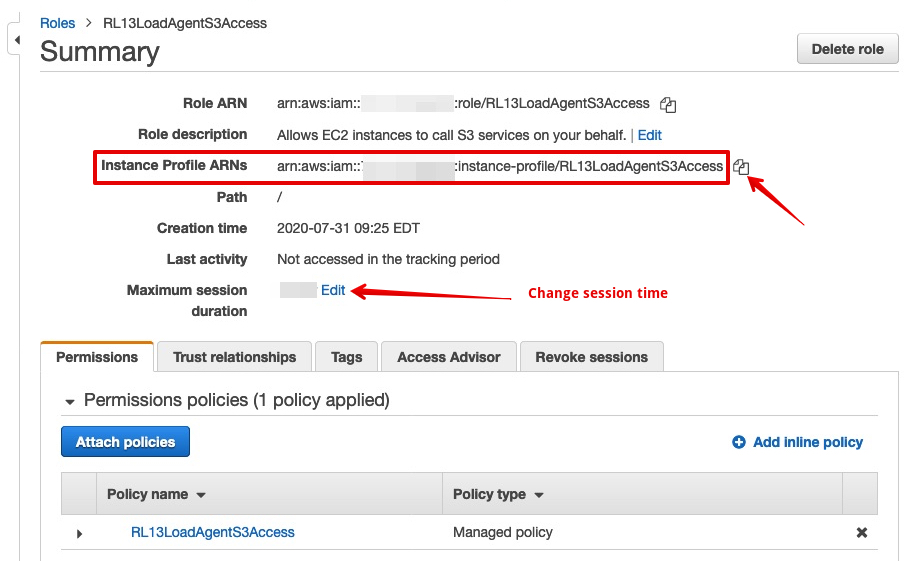
1 – Create an IAM Instance Profile in your AWS Account
– Here is a guide on “How-To create an instance profile role”
The final output to allow access to S3 buckets and an SQS queue might look like
2 – Your account must have IAM Pass Role on your AWS Key
- Go to https://www.redline13.com/AWS/Keys
- Press ‘Validate Policy’ on your AWS Key
- Confirm iam:PassRole is enabled

3 – When launching load test specify your IAM Instance Profile
- Start Test
- Advanced Cloud Options
- Select EC2 Instance Profile
- Enter your Instance Profile ARN
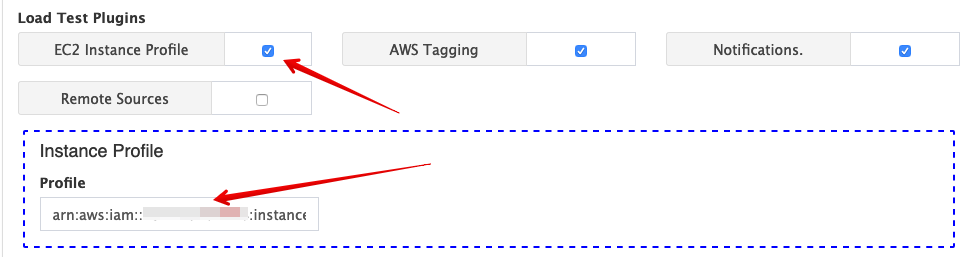
- Launch your tests
4 – If you want to have a default for all load agents or require it for all tests
- Go to account -> settings [https://www.redline13.com/Account/settings]
- Select Instance Profile
- Enter the default instance profile to use
- Optional: Check to require this on every load test

If everything is configured properly your load agents will have access to the AWS resources you specify.