EC2 IAM Instance Profile is the AWS way of giving limited access to EC2 instances to other AWS Resources. We document the benefit of this and how to use it within RedLine13 Load agents here. This document is a how-to for creating the EC2 IAM Instance Profile in AWS Console connecting EC2 to an S3 bucket.
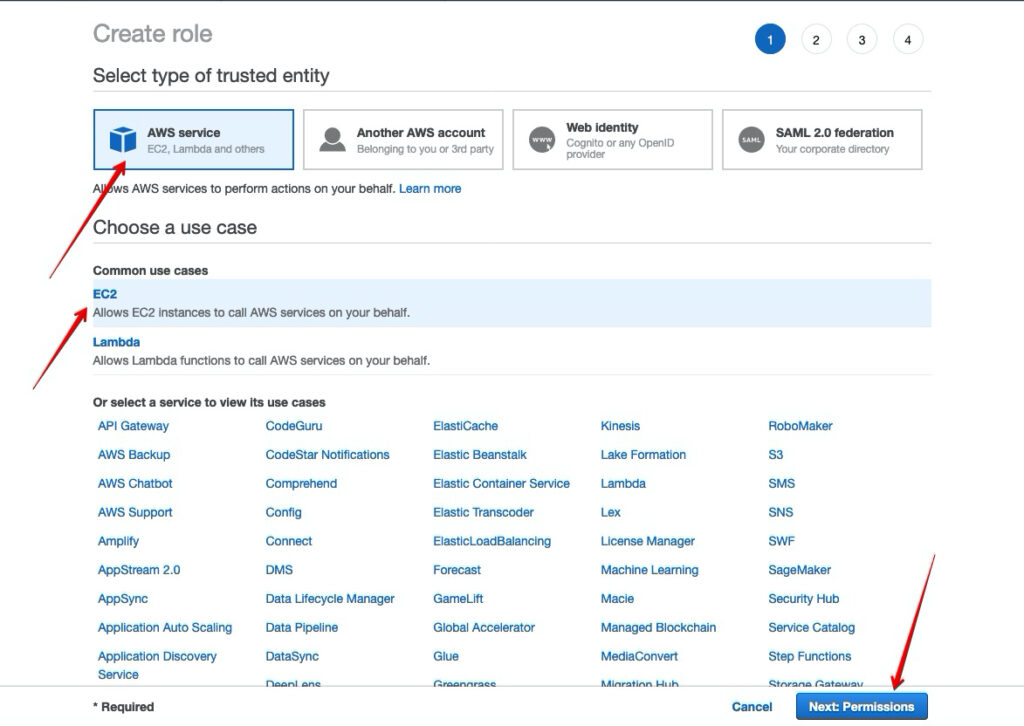
Step 1. Go to AWS IAM, Create Role
- AWS IAM Console Create Role
- Select AWS Service
- Choose Use Case -> EC2
- Click ‘Next:Permissions’
Step 2. Establish the Policy
Our use case is S3 access but this can be used for SQS or other resources.
- Create Policy
- We are going to skip the nuance here, you can use the wizard to generate the policy. For S3 we will use the JSON editor
- Once complete – Click ‘Review Policy’
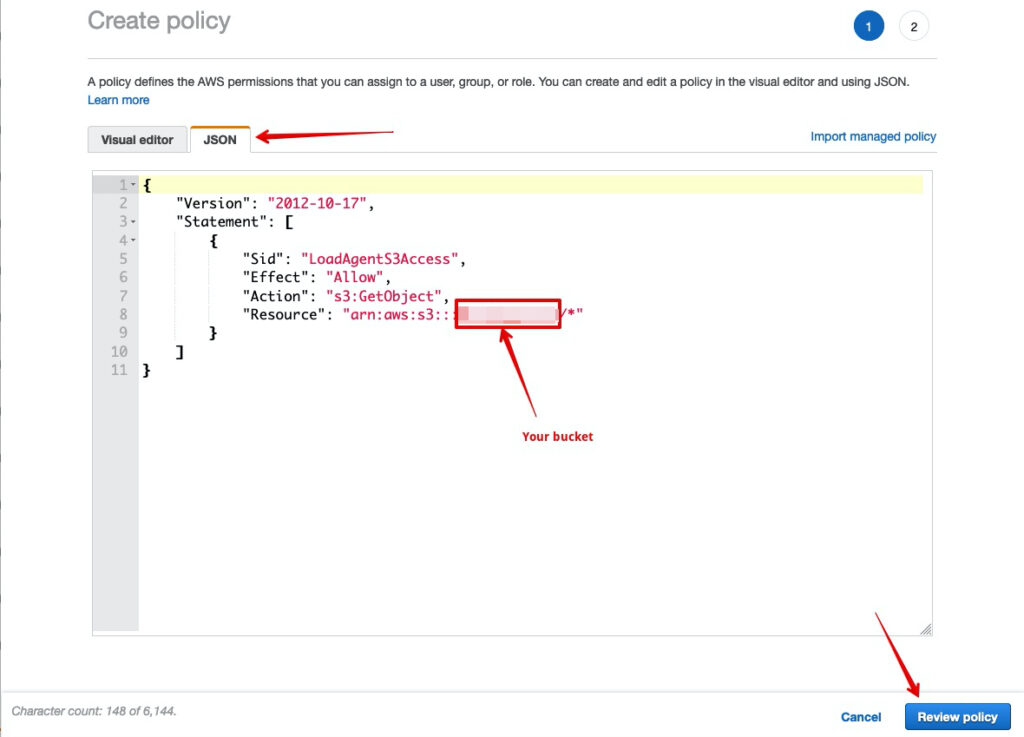
Example JSON Policy
{
     "Version": "2012-10-17",
     "Statement": [
         {
             "Sid": "LoadAgentS3Access",
             "Effect": "Allow",
             "Action": "s3:GetObject",
             "Resource": "arn:aws:s3:::YOUR_BUCKET/*"
         }
     ]
 }
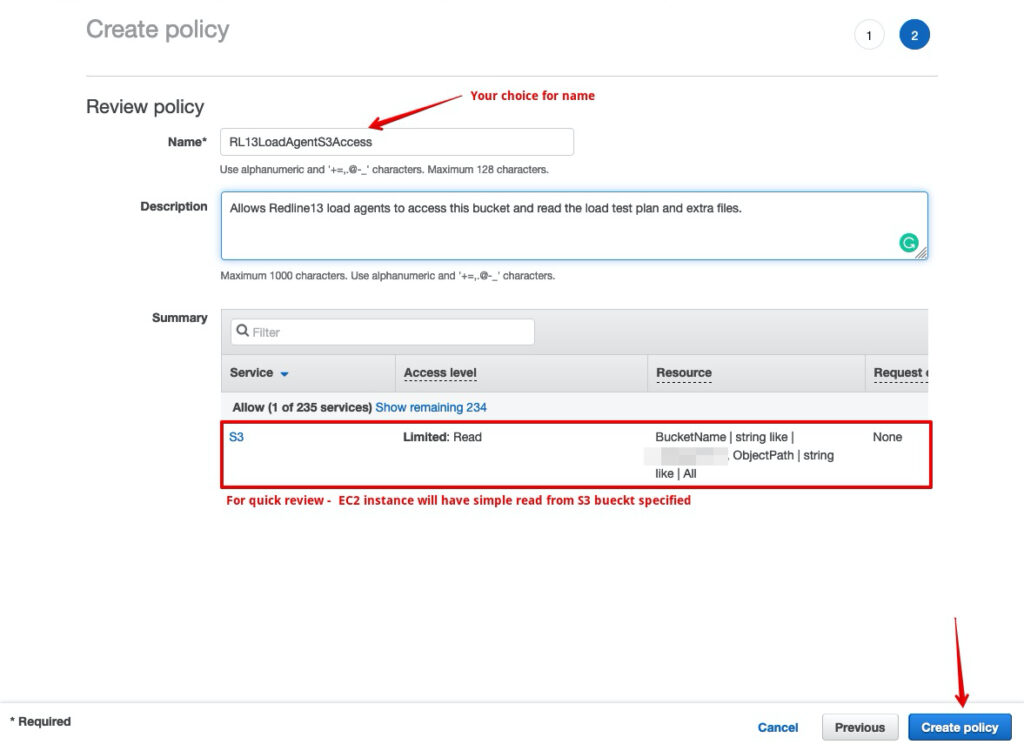
Step 3. Save and Create Policy
- Name your policy as you see fit.
- The description is optional.
- Review the access you are granting
- Click ‘Create Policy’
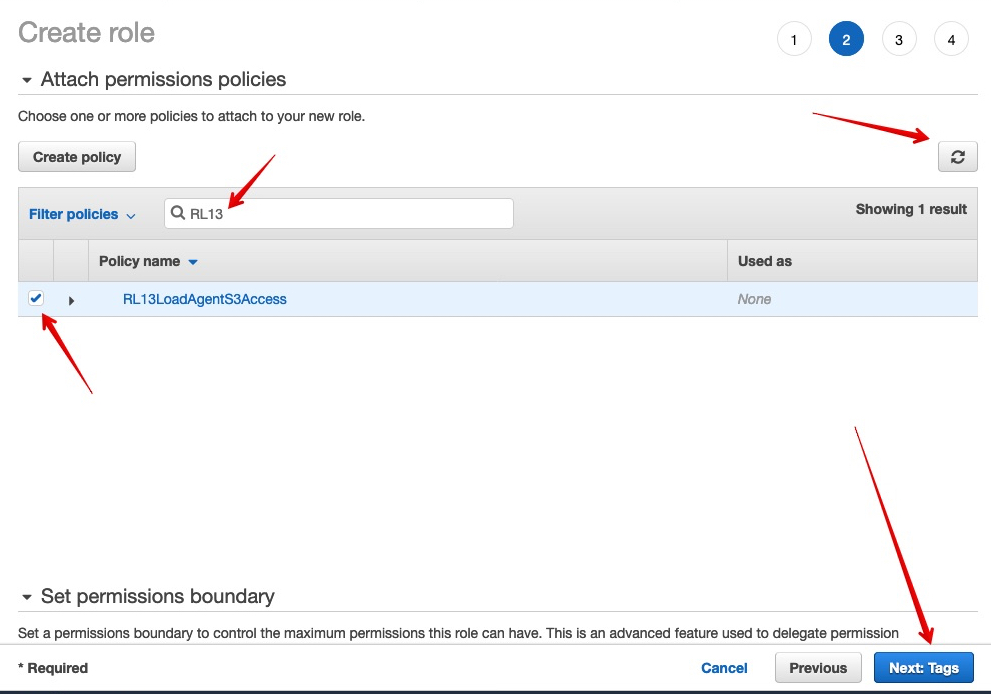
Step 4. Attaching the policy to the role.
- After create policy is clicked you should get back (switch back) to creating your role.
- You might have to hit refresh on the right side.
- Find and select the Policy you just created
- Click ‘Next: Tags’
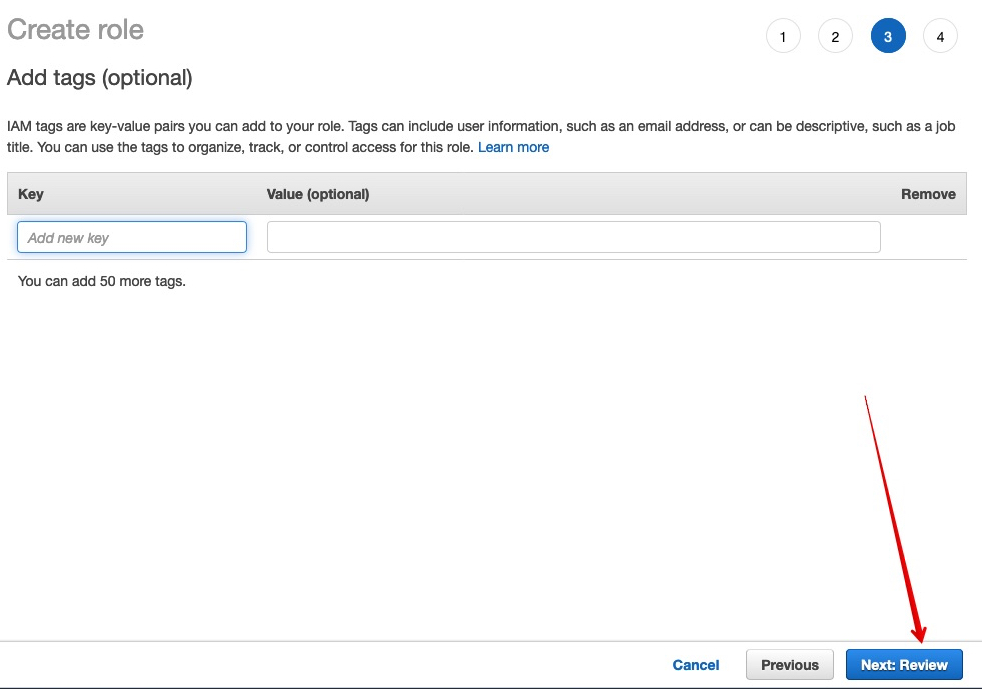
Step 5. Tags
- We don’t use tags, but you can.
- Click ‘Next: Review’
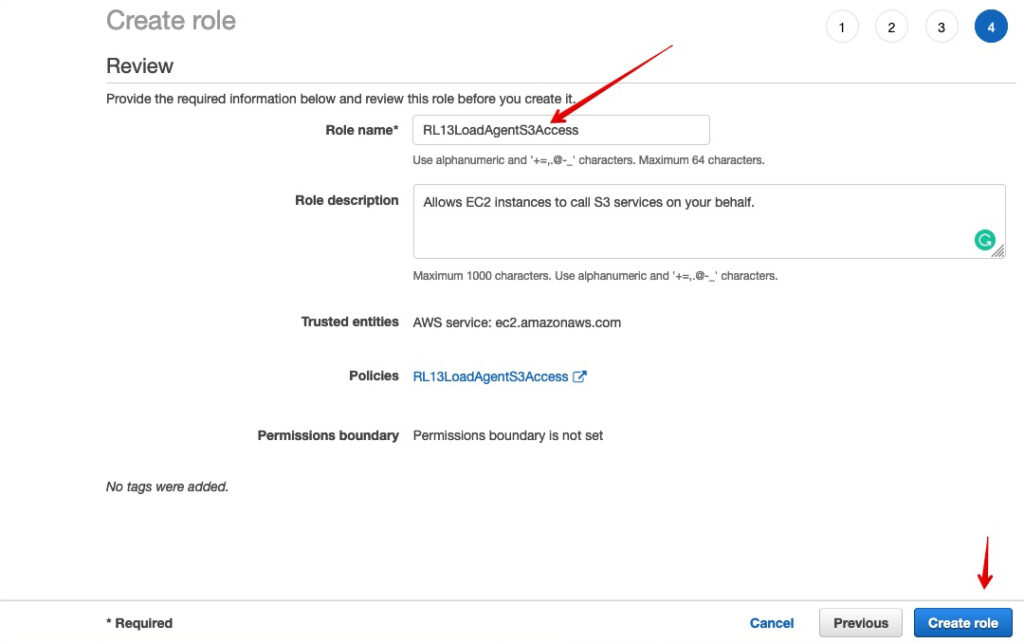
Step 6. The final step in creating the Role
- Name your role
- Optionally add a description
- Click ‘Create Role’
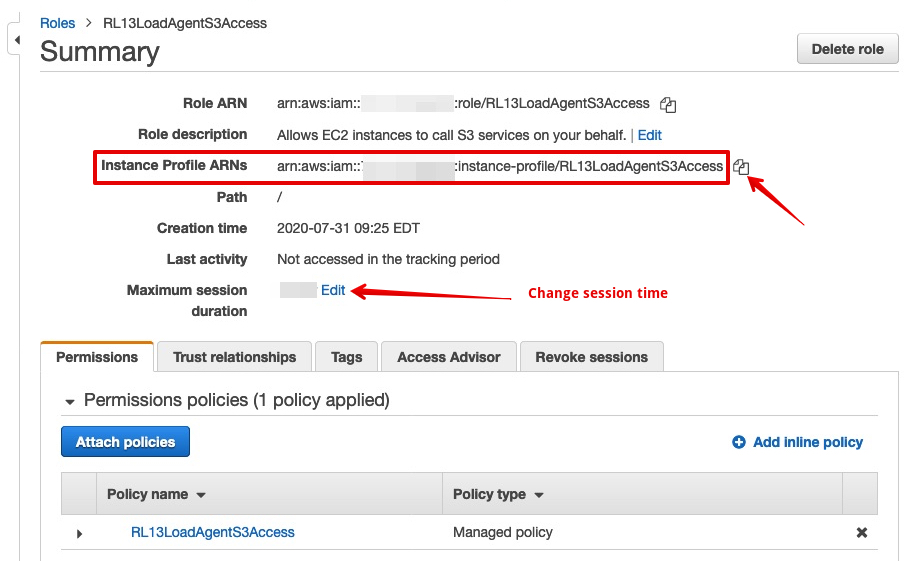
Step 7. What is your Instance Profile ARN
- You will need the Instance Profile ARN to use for your load tests.
- Find the role you just created and click on it.
- Once selected you can see the Instance Profile ARN
- Note: Change Maximum Session Duration if your load tests are greater than 1 hour.