In our previous blog post, we wrote about Data Driven Testing (DDT) using CSV files in JMeter. Excel files are another popular approach. This blog post will show step by step how to do Data Driven Testing with Excel files.
Contrary to CSV files, we will import some external libraries in JMeter and then write a few lines of code to perform data driven tests.
The other important aim of this blog post is that instead of Beanshell Sampler, we will use the Groovy code and compiler in the JSR223 Sampler to do our Data Driven Testing with Excel files.
Introduction
In this blog post, we will use Groovy code for making Data Driven Testing on JMeter because it gives us more flexibility in coding and provides better execution performance. The advantages of using the Groovy language on JMeter are:
- We can easily execute any remote OS commands. We already used this in a past blog post.
- Groovy scripts have amazing performance compared to the Beanshell Sampler.
- Almost all valid Java code is compatible with Groovy.
- You will write less line of code than the same code in Java.
- More readable syntax..
- In any JMeter Sampler, you have easy access to the JMeter function
__groovy(). - Debugging is easy with Groovy. In many cases, you need to see the value of variables in the scripts. We can easily use the logging functionality of Groovy by just writing
log.info(variable).
In our example we’ll be using same IOT (Internet of Things) application https://demo.thingsboard.io/ and adding new devices from our list as in our previous post. We will fill the form device information by getting data from our Excel data file.
Step by Step – Data Driven Testing with Excel Files in Groovy
First, we need to add the following libraries under the JMeter Lib folder. I am using JMeter 4.0 version. If JMeter is running, first close JMeter. Add these libraries:
· commons-collections4-4.1.jar
· xmlbeans-2.3.0.jar
· Apache POI 3.17
· Apache POI-OOXML 3.17
· Apache Commons IO 2.6
· OOXML Schemas 1.3
HTTP Test Script Recorder
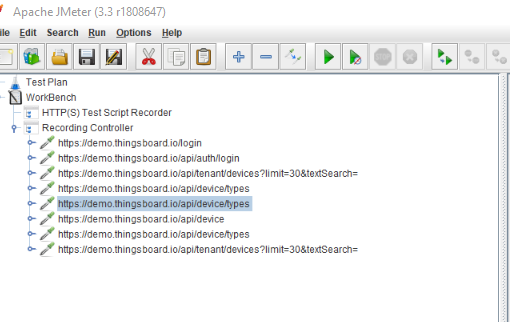
After adding libraries, we record our IOT application device adding processes using JMeter’s “HTTP Test Script Recorder”. You can exclude the types of content you do not want to request (e.g. *.jpg, *.png, *.js, etc.) by selecting the “Add Suggested Excludes” option in JMeter Test Script Recorder.
After the recording is completed, our script looks like this:
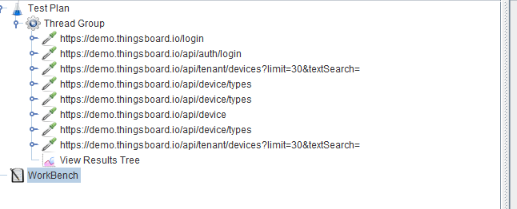
I have renamed it to something meaningful, moved it from Recording Controller to Thread Group section and deleted the Recording Controller.
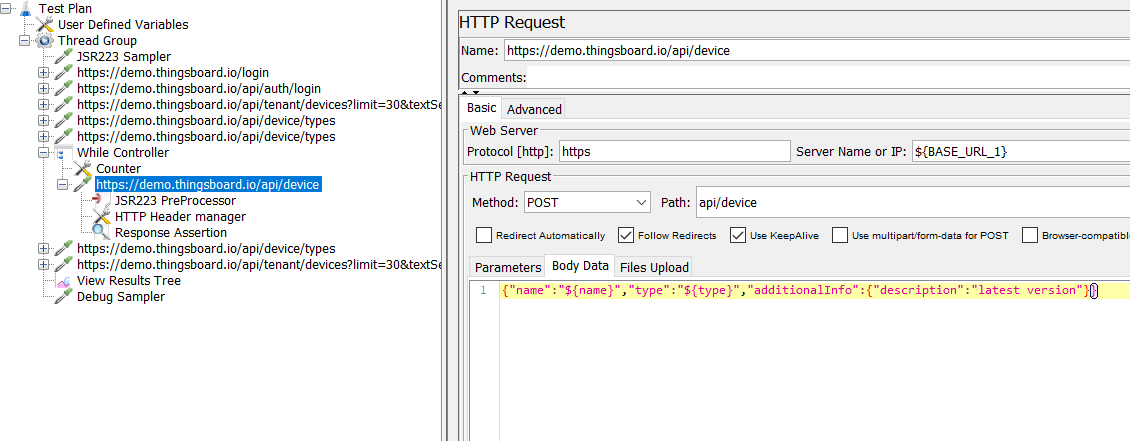
The following request contains “name” and ”type” descriptions. We implement Data Driven Testing for name and type variables.
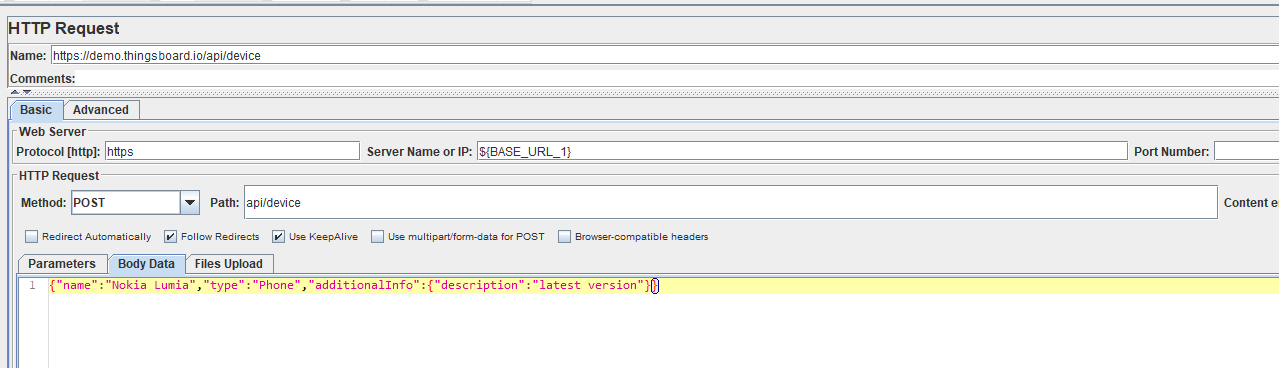
Each line of the Excel file has 2 columns, one for device name and the other for device type. You can add more data types as needed. In this example, we are using two different data variables.

We are adding the JSR223 Sampler to create a Workbook object based on the Excel file.
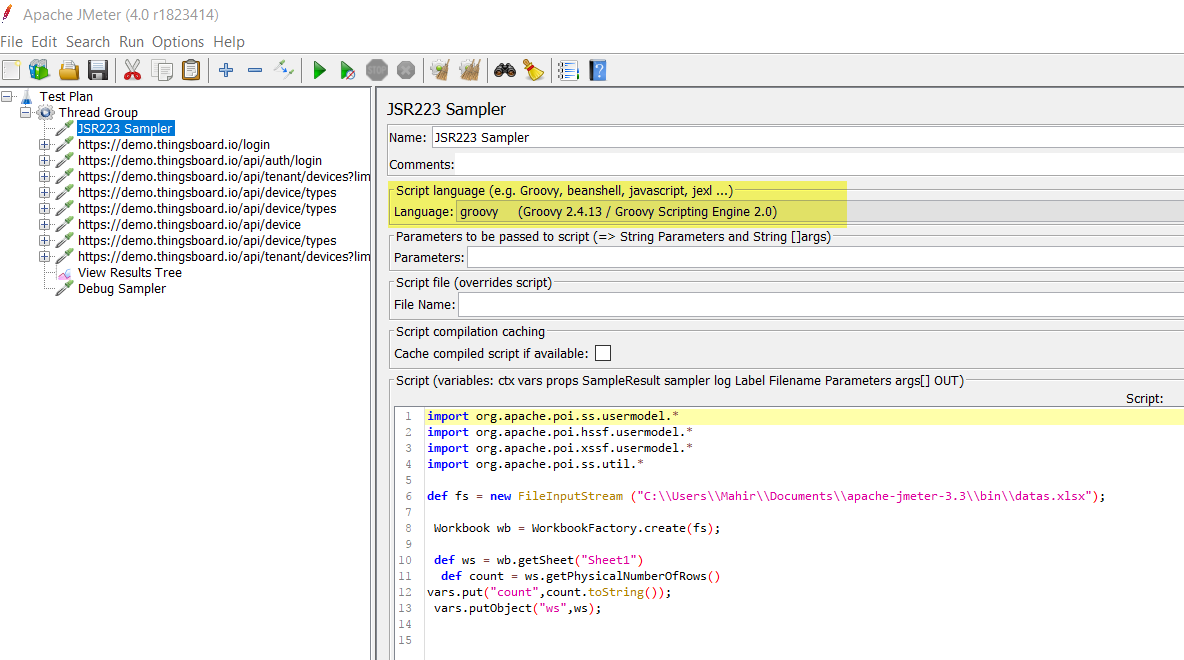
Here’s an explanation of what the code above does.
We obtain input bytes from our Excel file and keep it in the fs variable.
def fs = new FileInputStream ("C:\\Users\\Mahir\\Documents\\apache-jmeter-3.3\\bin\\datas.xlsx");
Then we get the workbook instance for XLSX file and named it as a “wb”.
Workbook wb = WorkbookFactory.create(fs);
And finally we select the first sheet of our xlsx file.
def ws = wb.getSheet("Sheet1")
To perform data driven testing it is important to determine how many rows our Excel file has. The first line of code gets the count and the second line assigns the total count variable as a global JMeter variable “count”. We will use this count variable to set the looping size to the number of rows in our Excel file.
def count = ws.getPhysicalNumberOfRows()

vars.put("count",count.toString());
Below is the most important command that we create to store the object as “ws” to get all of the rows from the Excel file at a current sheet.
vars.putObject("ws",ws);
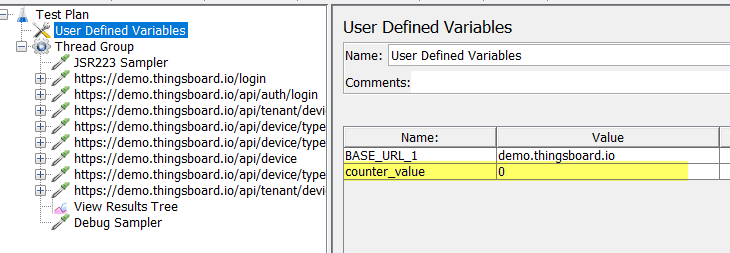
User Defined Variables
Now we add the User Defined Variables and create a variable named “counter_value” with the starting value of “0”. The value of this variable is initialized and declared as the counter. We will start this variable at 0 and loop until the number of rows in the Excel file.
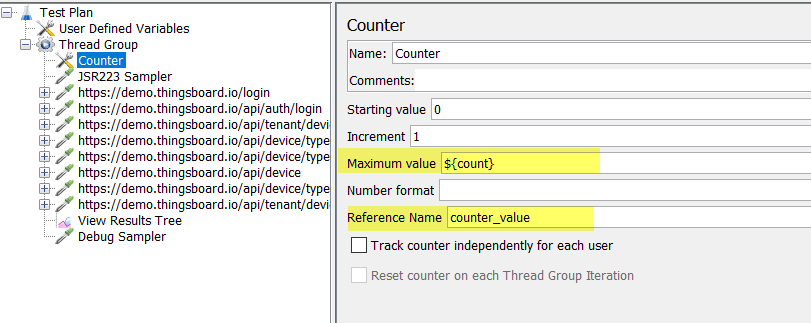
We next add the Counter Config Element to handle loop operations for our next process.
Maximum_value: In this section, we determine the total row count of our Excel file.
Reference Name: We name the Counter “counter_value”. It holds the current counter value.
Increment: The value that is added to the value of the variable “counter_value” before sending the next request. Set it to “1”.
While Controller
We add the While Controller to send requests for each row of data in our Excel file. Then, we will determine the Condition to stop the While Controller.

In the following step, we pull data from the proper row and cell and save these values in variables “name” and “type”.

def name=vars.getObject("ws").getRow(0).getCell(0);

vars.put("name",name.toString());
getCell(0) points to first column the “name”
getCell(1) points to second column as the “type”
vars.put("name",name.toString());
We saved the “name” and “type” variables as global JMeter variables and pass them to the our Http Request.
Response Assertion
In the previous post, we mentioned that the essential part of Data Driven Testing is to use Response Assertion to determine whether the specific data passes or fails. So we will add the Response Assertion to our HTTP Request and configure it.
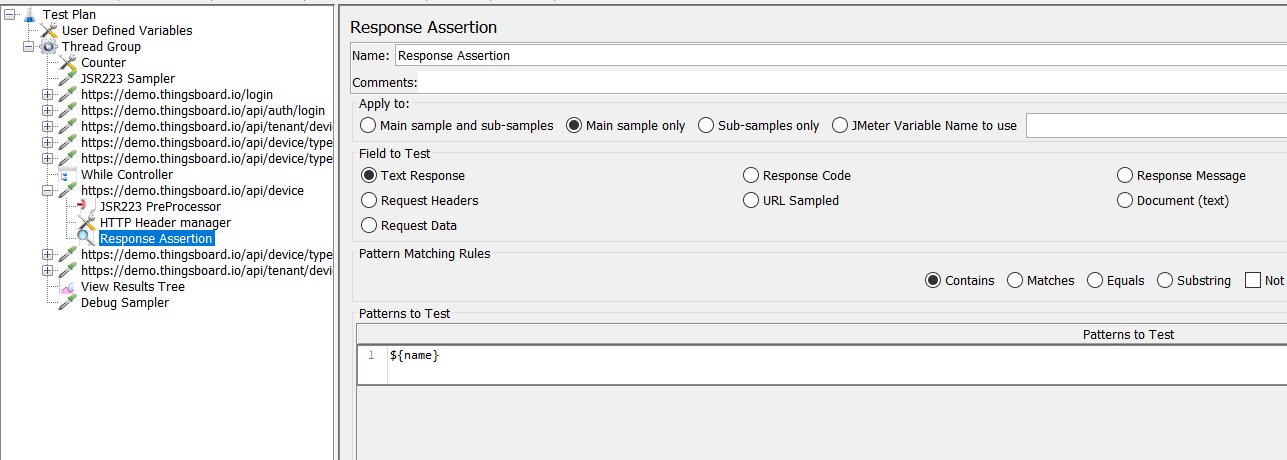
Now we need to configure and change the name and type fields to a dynamic value. The JMeter variable syntax looks like this ${variablename}.
We then move our Counter Config Element and Device Add HTTP Request into the While Controller. Before running the script, the JMeter project file structure looks like this:
In order to see the Response Assertion’s work in failures situations, I intentionally added the same device names to our Excel file.

Running our Script
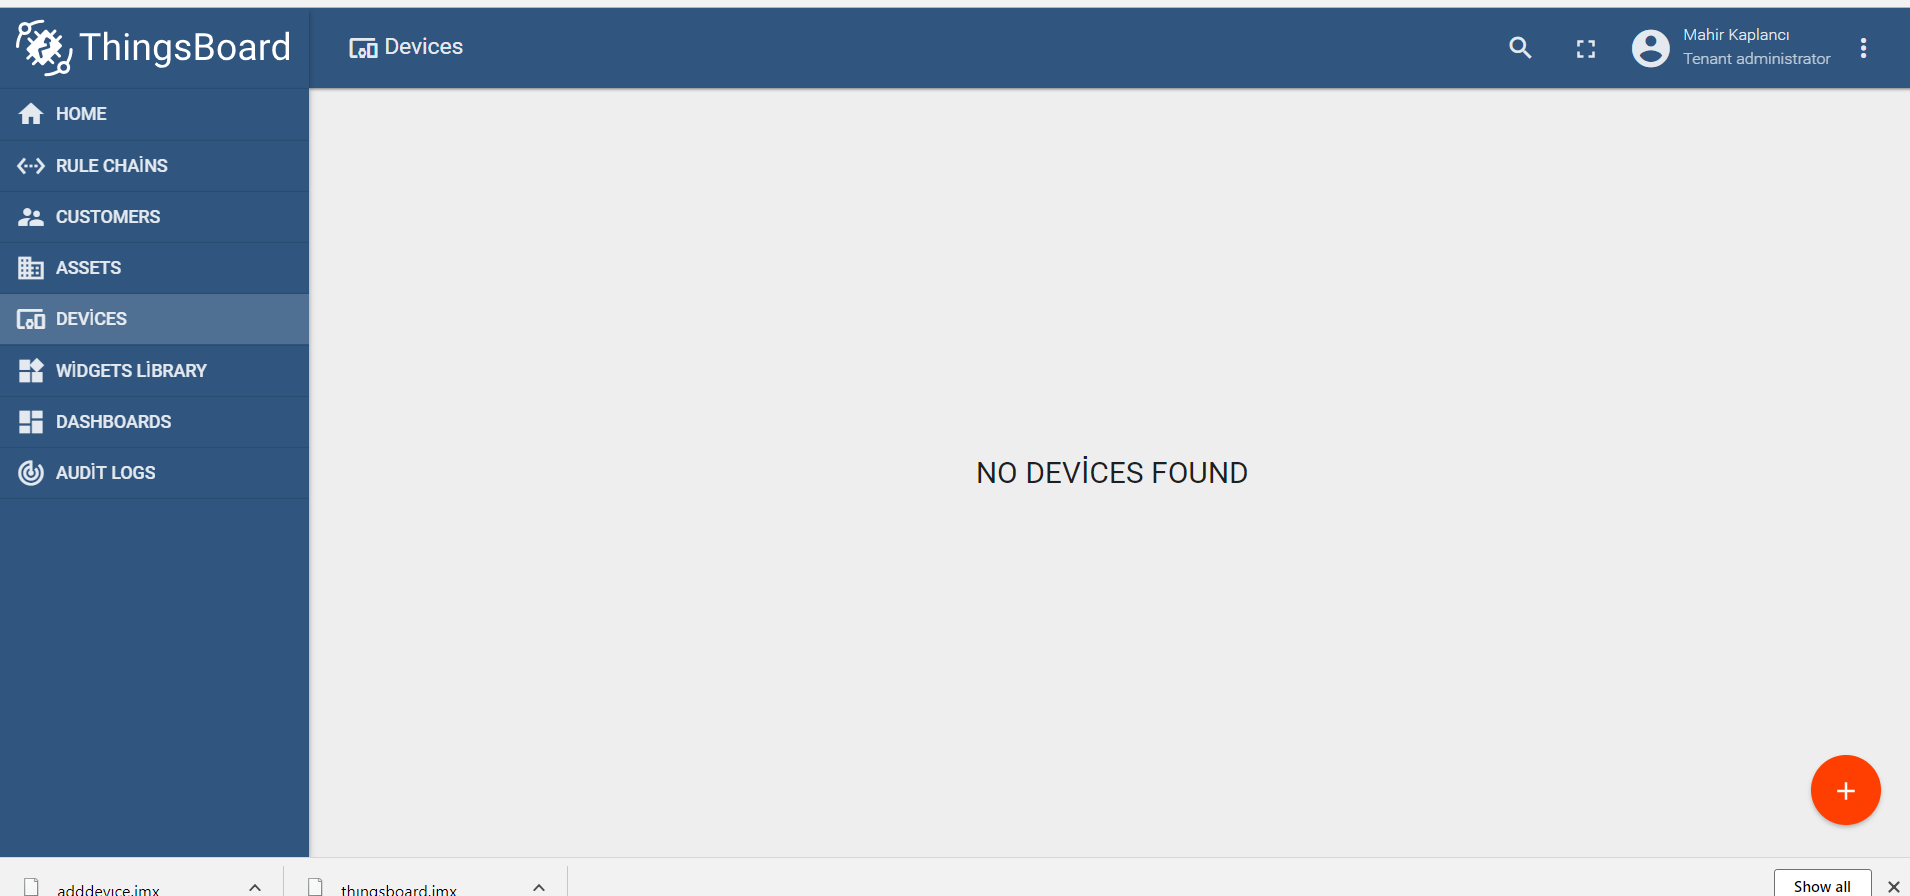
Before starting the test, our application has no devices.
When we run the script, some requests failed because they were the not verified by the Response Assertion:


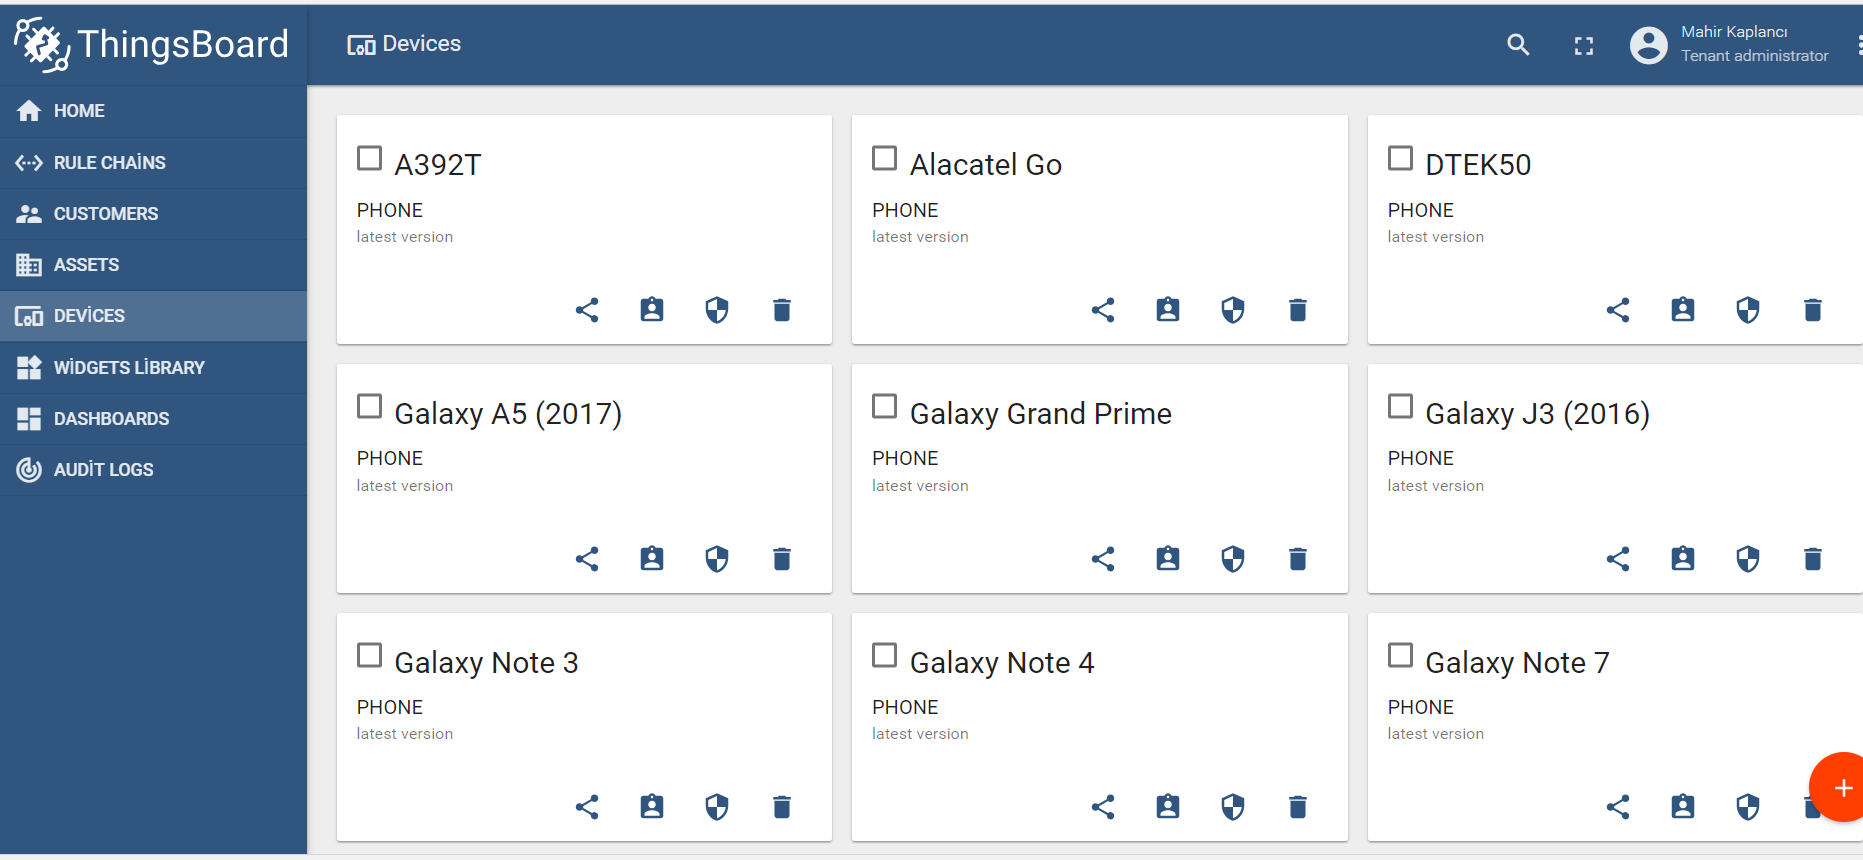
After completing the scripts, we can see that devices are added into the system.
After checking that our script worked well, we can run this script, as you would with any JMeter script, on AWS (Amazon Web Services), to performing load test using RedLine13. Apache JMeter is one of the most popular tools for load testing and scaling out our JMeter test plan on the cloud in RedLine13 is easy. This guide and video walks you through running your first JMeter test on RedLine13.
That’s it. We did Data Driven Testing with Excel Files in Groovy.