
When developing your k6 tests, you will likely want to debug them before deploying to the cloud. This is especially important as your test grows more sophisticated and becomes more complex, and you will inevitably want confirmation that your test is performing as expected. By installing k6 on your local machine, you can debug your tests in near real-time with direct feedback from the k6 engine. In this brief post, we will show you how to download and install k6 locally, and provide some suggested tools and techniques to help develop your test plans more easily.
Download and Install k6
You can download k6 directly from k6.io. For most users, the preferred method for downloading and installing is through a package manager. The exact procedure will vary slightly depending on your local machine platform. The procedures for all supported platforms can be found in the k6 documentation pages.
Starting k6 from the Command Line
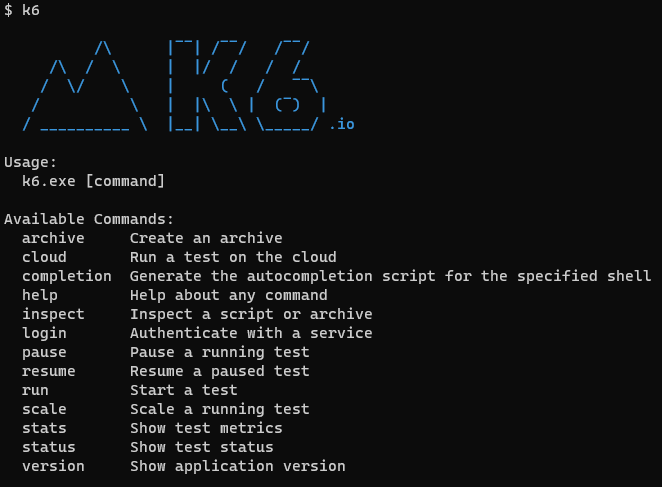
Since there is no GUI, all k6 tests are started from the command line. We’ll cover more on how to actually do this at a later step below. For now, we will want to verify that k6 has installed without issue and is ready to use. If we simply type k6 at the command line without any arguments, we should be greeted by the k6 help and usage output as shown below:
We can additionally check that the latest version of k6 has been installed by running the k6 version command, which at the time of this writing corresponds to v0.47.0:

Download a Code Editor
Any code editor capable of editing JavaScript source files will suffice, however our recommendation is to use Microsoft Visual Studio Code as it is the editor endorsed in the documentation for k6. There is even an official k6 extension for Visual Studio Code that is published by Grafana Labs, though this is not necessary whether you are using Visual Studio Code or a different code editor.
Sample Tests and Getting Started
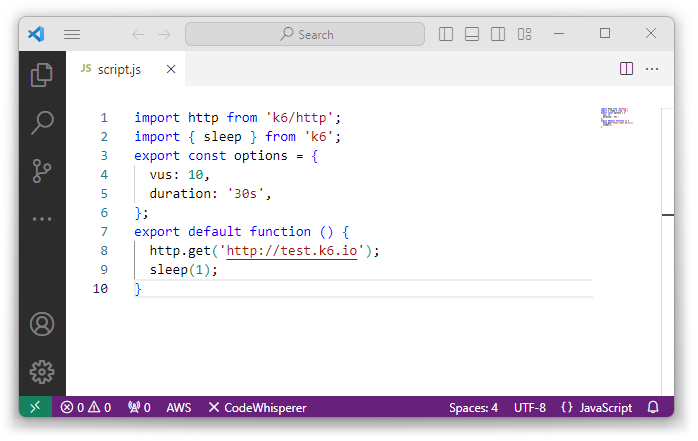
The official k6 documentation comes with many examples that are likely relevant to your specific test needs. A good starting point is the HTTP Requests page which defines the basic structure of a k6 test and the essential action of consuming a response to a simple web request. The remainder of the examples expand on higher level concepts that build upon this foundation. You can easily copy the test plan source for one of these tests and paste it into your code editor to jump start your own test.
Run Tests Locally
When it comes time to run your test, we’ll need to get back to the command line. Referring to the official k6 documentation for running a test, we will want to use the following syntax to initiate our test:
k6 run <script.js>
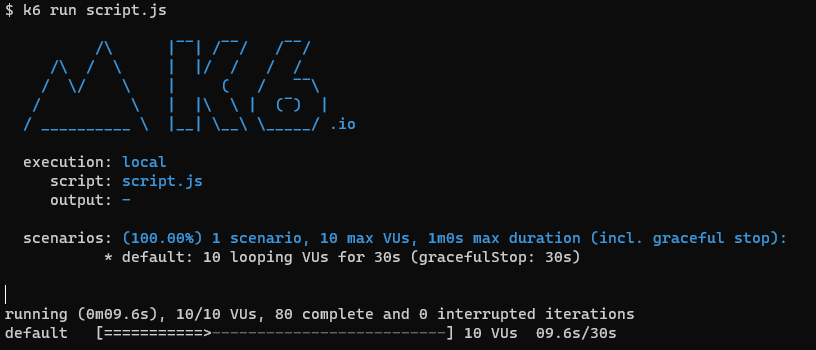
Replacing <script.js> with the path to the script file containing our target test plan. This will immediately initiate the execution of the specified test plan, with dynamic status output resembling the following as it runs:
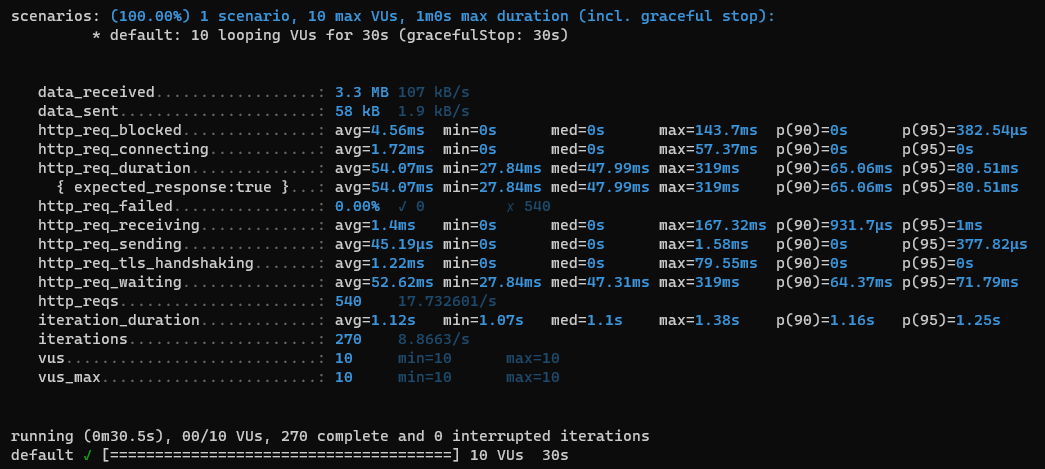
At the conclusion of the test, k6 will display a text-based table with aggregate results. This information can be compared against similar provided data collected when the test is run in the cloud. For reference, here is the output that our simple example test generated:
Did you know that RedLine13 offers a time-limited full-featured free trial? Sign up now, and move your k6 tests into the cloud today!