Integrating your AWS and RedLine13 accounts
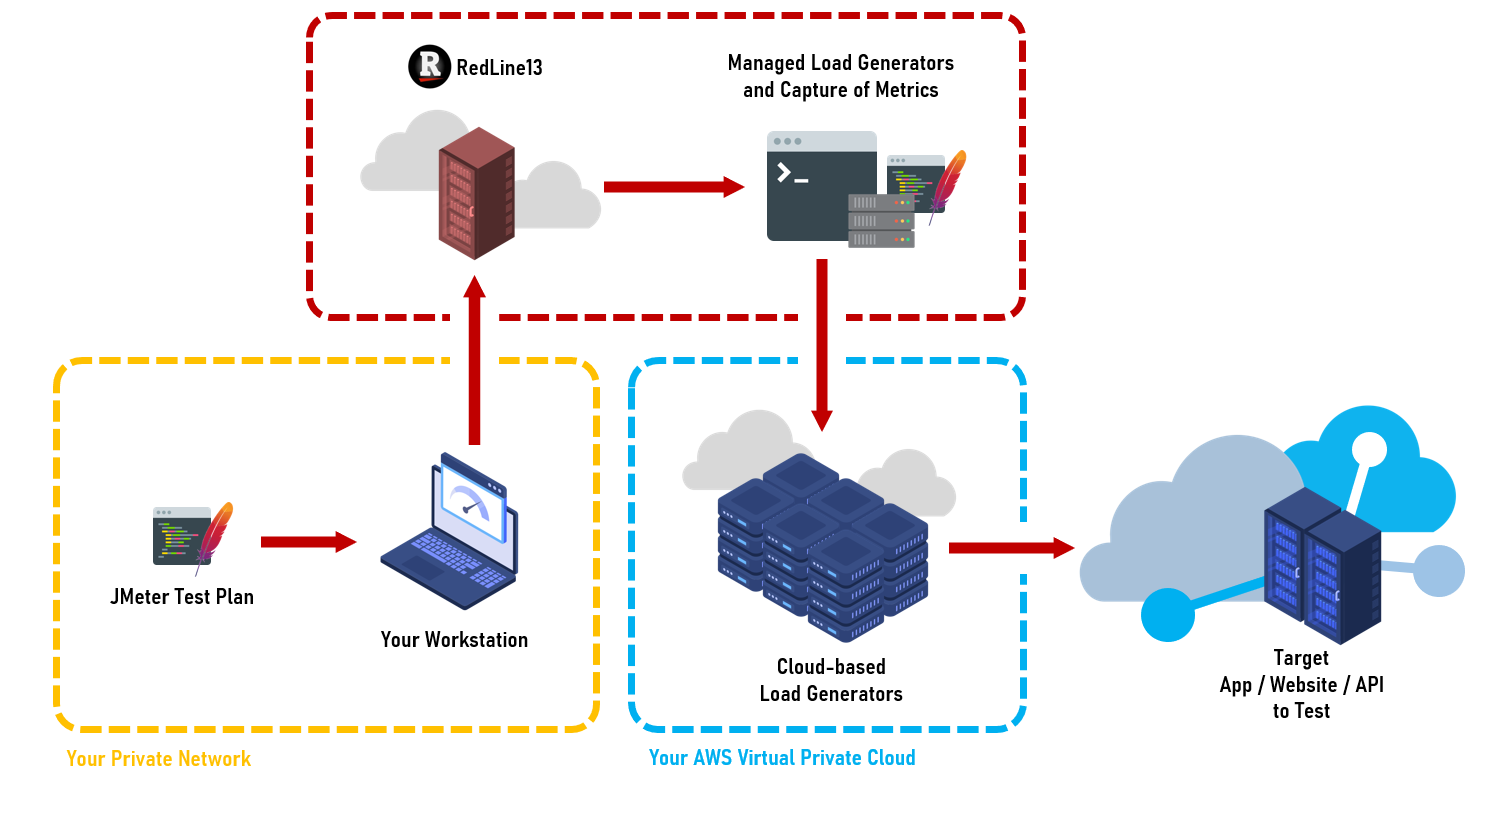
One of the key benefits of using RedLine13 is the ability to abstract away the management of individual load agents on AWS. RedLine13 will then spin up, manage, and terminate load agents without you ever having to worry about any of those details. In this blog post, we will be guiding you through this one-time process of integrating your AWS account with your RedLine13 account.
What is Required?
RedLine13 makes it easy to connect your AWS account. (If you don’t already have an AWS account, you can create one for free here.) We use IAM policies and best of industry-standard security practices to safely establish a secure connection. All that is required is basic knowledge of AWS management and network security principles. Following the conveniently illustrated steps below, you can be fully integrated in under 15 minutes.
Start to Finish in a few Easy Steps:
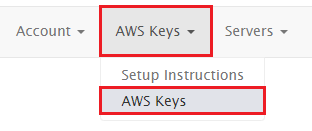
To get started, log into your account and from the “AWS Keys” menu, select the “AWS Keys” option:
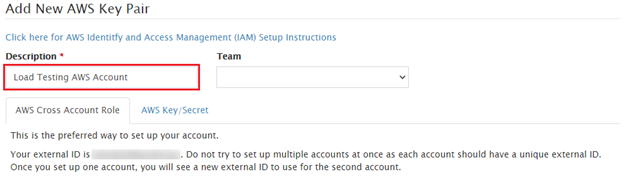
We will be creating a new AWS key pair. The first step is to give our key pair a name. We have chosen “Load Testing AWS Account”:
The preferred integration method is using an “AWS Account Role”. The next step is to set up an IAM role within your AWS account. Click on the blue “Toggle Instructions” button:
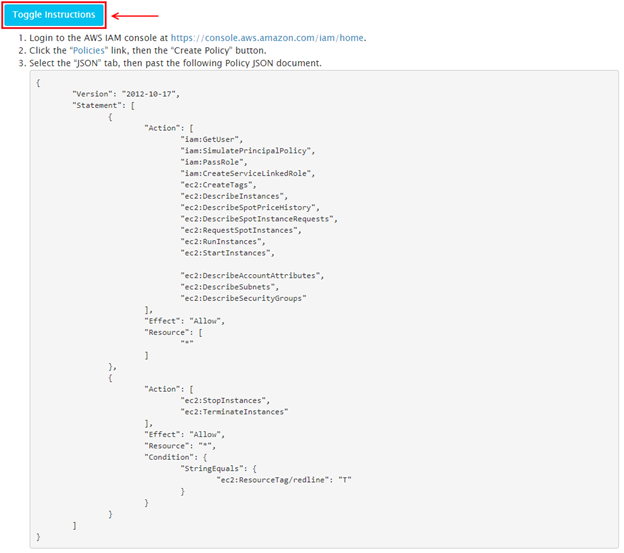
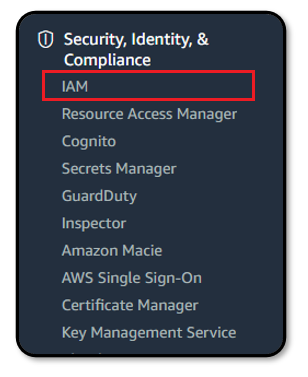
Copy the JSON policy under Step 3. Within your AWS console, navigate to “IAM” under “Security, Identity, & Compliance”:
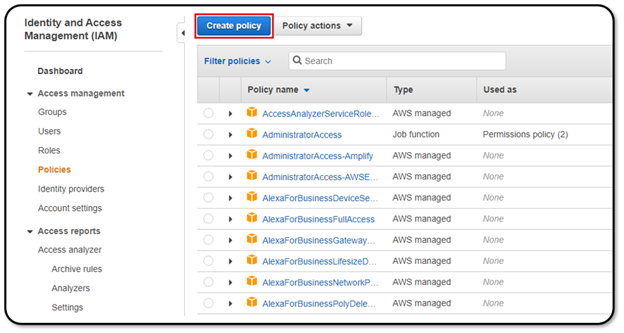
From the “Policy” link on the left side, select “Create policy”:
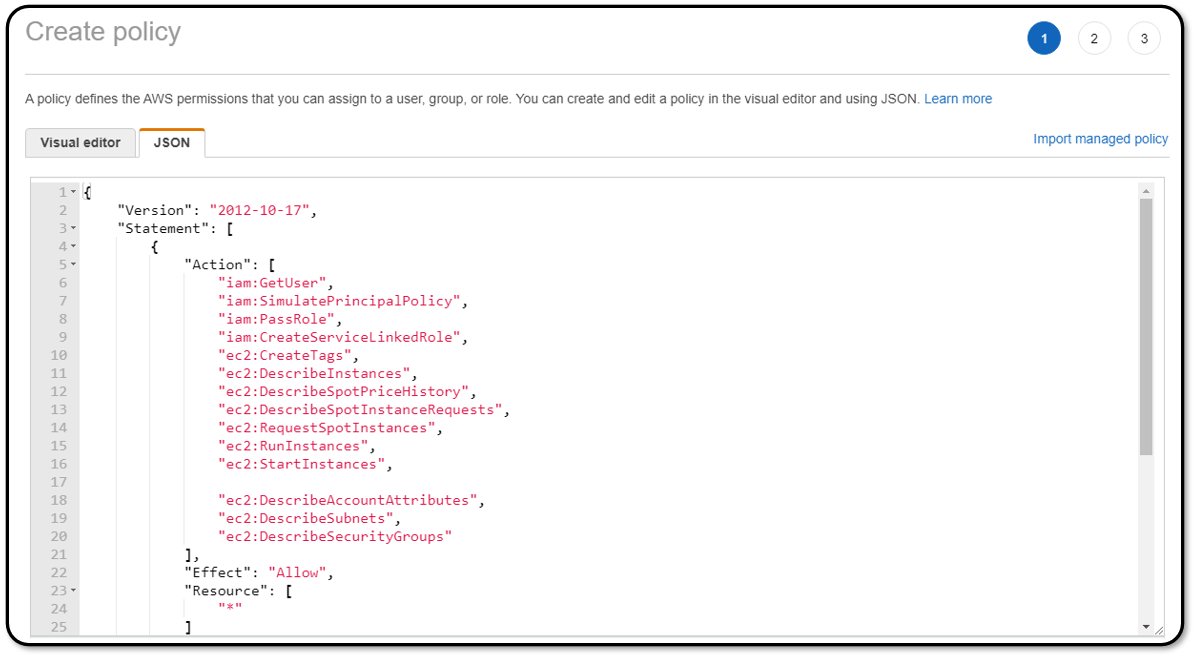
Select the “JSON” tab and paste the policy copied from Step 3 found under the RedLine13 Key Pairs instructions.
Click through to the final step of the policy creation. You will be prompted to give your new IAM policy a descriptive name. We suggest something like “RedLine13_Access”, but you may choose any policy name:

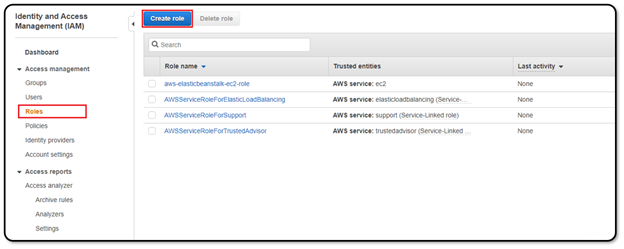
Back on the main IAM screen, from the “Roles” link on the left side select “Create role”:
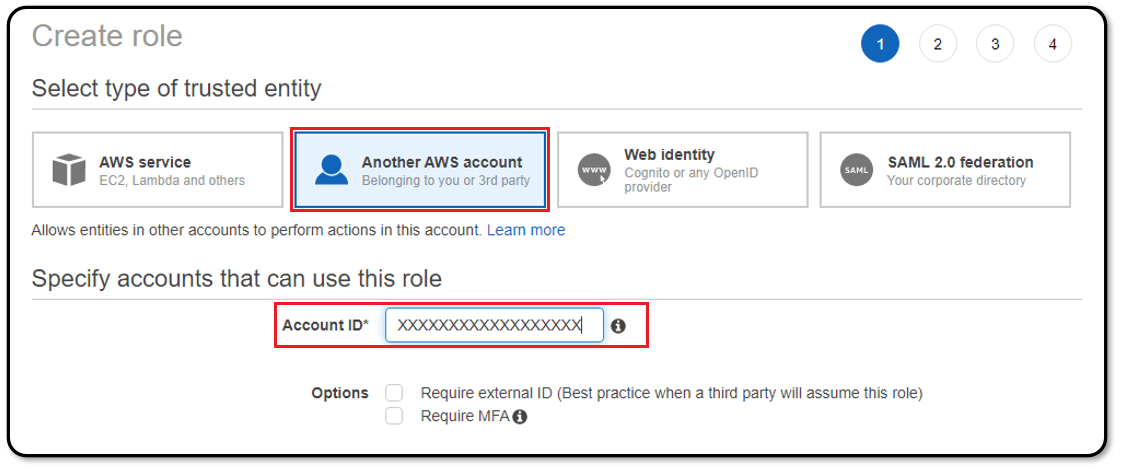
Select “Another AWS Account” and enter the RedLine13 account ID 635144173025:
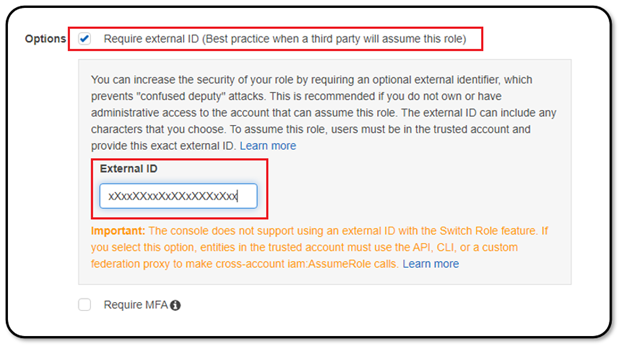
Check the “Require external ID” checkbox, and enter the unique external ID number found on the RedLine13 Key Pairs page (also listed with Step 9 of the key pair instructions):
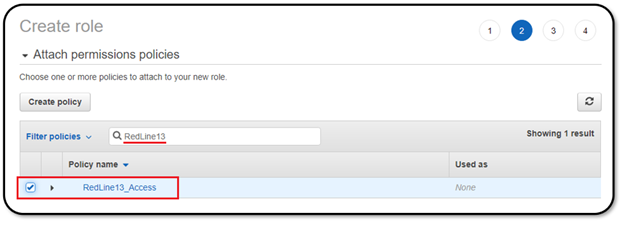
On the following page, you will have the opportunity to attach the policy created above. You can search for the policy by typing in part of the meaningful name you gave it earlier. To attach the policy, ensure that it is checked in the list below:
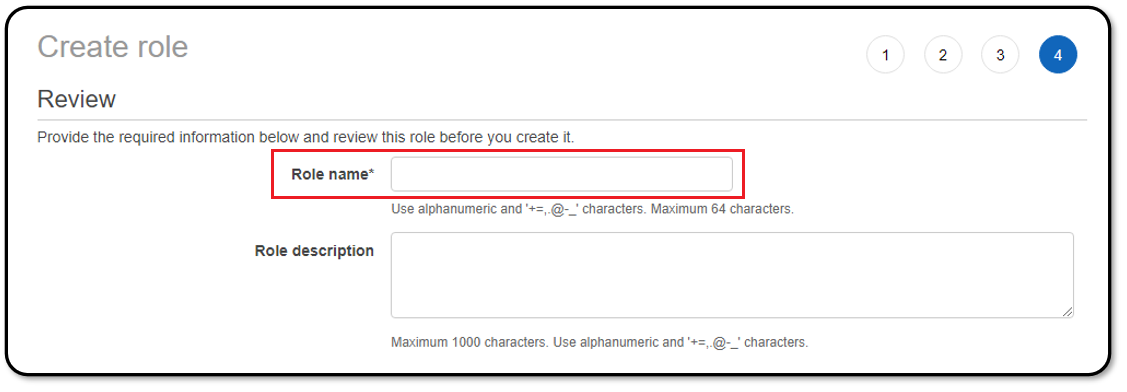
Click through to the final page of the role set-up, where you will be required to give a name to your role. We recommend something along the lines of “RedLine13_Access”, however you can choose any name:
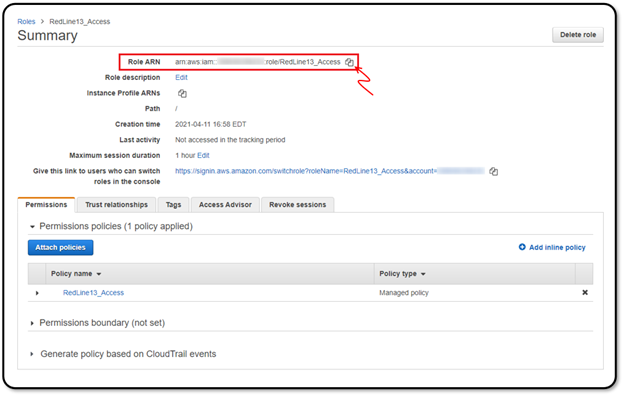
You will be brought back to the AWS Roles page. Select your role by clicking on it, and find the “Role ARN”. This can be copied to the clipboard by clicking on the “copy” icon next to the ARN string:
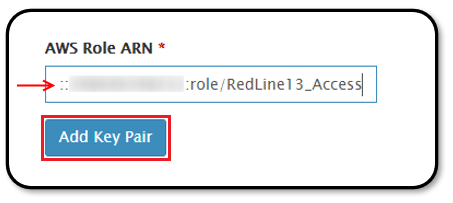
Paste this into the “AWS Role ARN” text box back in the RedLine13 “Key Pairs” page. Click “Add Key Pair”:
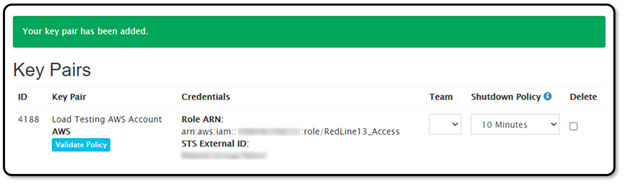
The AWS integration is complete. The newly added key pair will appear in the “Key Pairs” listing, along with a message that they the key pair was added. This will verify that all of the above steps have been completed successfully:
Return to the Test Dashboard and click on “Start a New Test”. The last step is to verify that RedLine13 has all of the necessary permissions set up properly to spin up load agent EC2 instances in AWS and execute tests. For that we recommend starting a JMeter test and adding at least one load agent.
We hope that you find the simplicity and abstraction of AWS management as a useful boost to your cloud-based JMeter load testing. You may also consider some of the more advanced features our Basic and Premium plans offer, which can be evaluated with a free trial.