To use specific IP addresses for your test you will need to setup Elastic IP on your AWS account and associate it to a running load agent.
Setting up Elastic IPs on AWS are documented here.
As the standard load agents created are ephemeral and therefore hard to associate a public IP to we recommend using a paid RedLine13 account.
This will give you access to our ‘Server Management’ Feature.
You would schedule your load agent for a period of time, ie the full week or day of testing.
Once the agent is running, you can manually use AWS console to associate your elastic IP address.
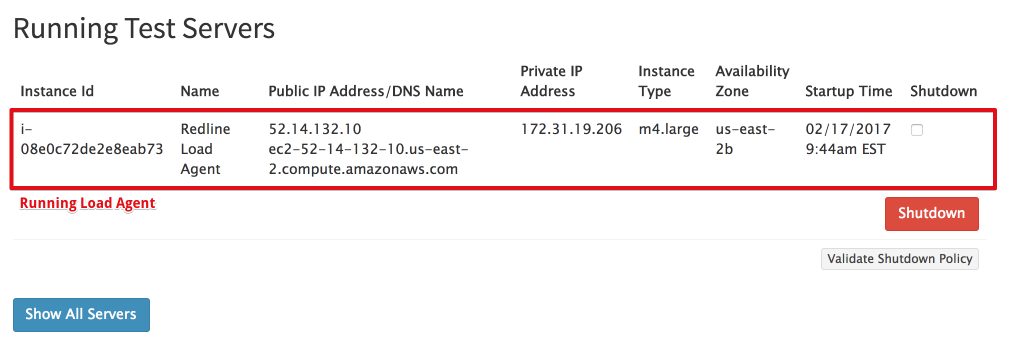
1 – Take a look at your running servers on RedLine13 – Servers -> Running Servers.
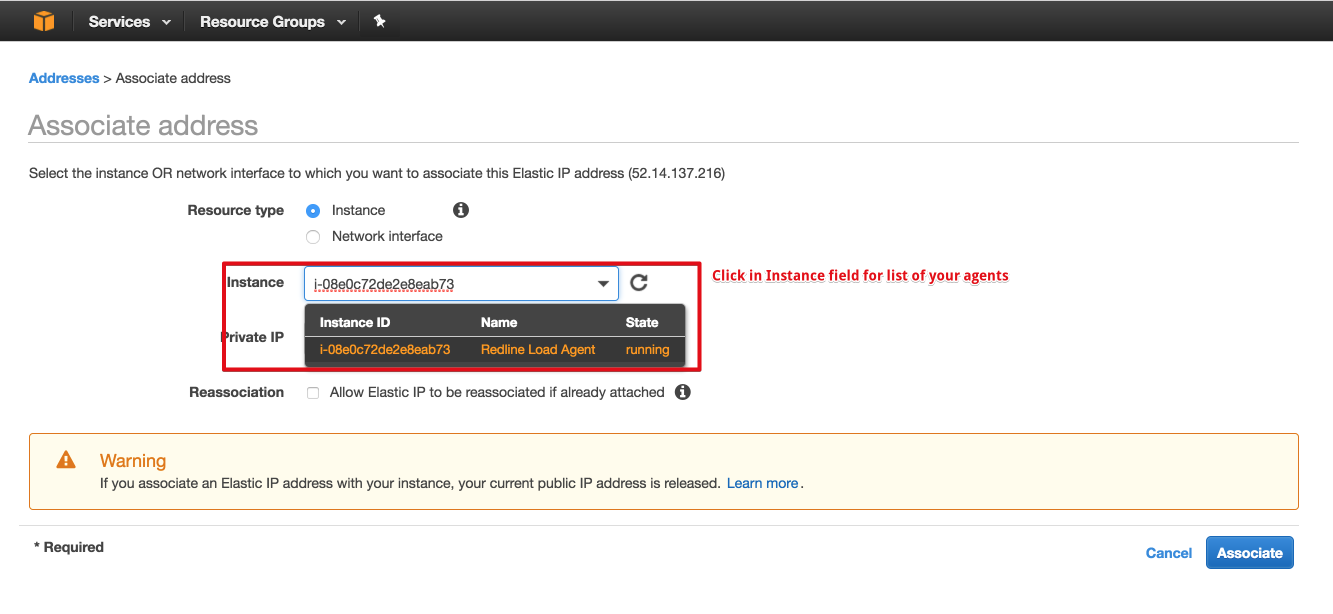
2 – Open your AWS EC2 console to the correct region and select Elastic IPs from left menu.
- If you do not yet have Elastic IPs allocated, do so.
- Make sure you have either VPC or Classic Elastic IP as needed.

3 – Start the process to associate IP address from the Actions

4 – Select the Instances to be assigned the Elastic IP address.
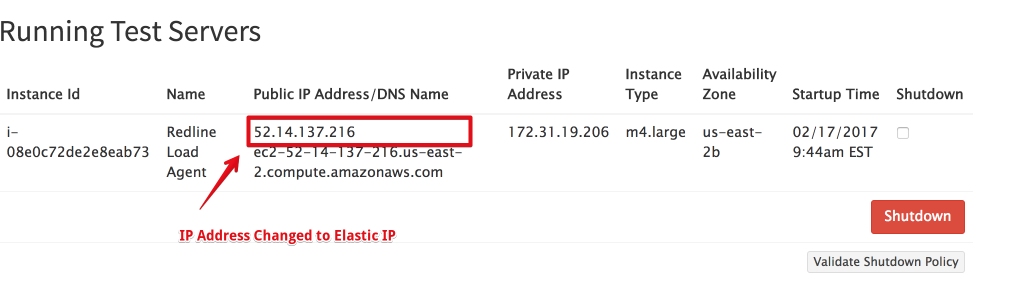
5- You can then reload Servers -> Running Servers
Now you will see your public IP address change. Ours changed from 52.14.132.10 to 52.14.137.216. Just give this new elastic IP address to your Operations folks and they can use this IP address in their whitelist.
6 – Repeat this process for your load agents.
Each load agent will need to have its own IP address in this model. If a load agent goes away and a new one is created the Elastic IP address will need to be associated with the new load agent.
For a more robust solution with increased configuration complexity you can use NAT gateways, read more about setting up Load Testing with private subnets and NAT.