What are WebSockets
The WebSockets specification enables Web applications to maintain bidirectional communications with server-side processes, this specification introduces the WebSocket interface.
In plain words: You can maintain a persistent connection between client and server which is available for data communication anytime while the connection is open. Some resources and tutorials include
Using JMeter to Create WebSocket Requests
By default, JMeter does not provide a websocket sampler. However, the JMeter community is pretty powerful. Maciej Zaleski wrote an open plugin to do the work – WebSocketSampler
Your first WebSocket JMeter test
(also see: CustomTests for Load Testing Websockets)
1. To install this plugin locally, you have a couple of options
- Manual
- You will need to download the plugin
- Then download the dependencies from http://mvnrepository.com/
- jetty-http-9.1.1.v20140108.jar
- jetty-io-9.1.1.v20140108.jar
- jetty-util-9.1.1.v20140108.jar
- websocket-api-9.1.1.v20140108.jar
- websocket-client-9.1.1.v20140108.jar
- websocket-common-9.1.1.v20140108.jar
- Saving them to your [JMeter installation]/lib/ext
- Packaged
- On our fork, we built a drop in ready with some of the pull requests merged
- After download Extract into [JMeter Installation]
- unzip JMeterWebSocketSampler-1.0.2.zip -d [JMETER INSTALL DIRECTORY]
2. Restart JMeter
If your Jmeter is already open, then close it and start again.
3. You will see a new sampler “WebSocket Sampler” in sampler list which you can add to your test plan
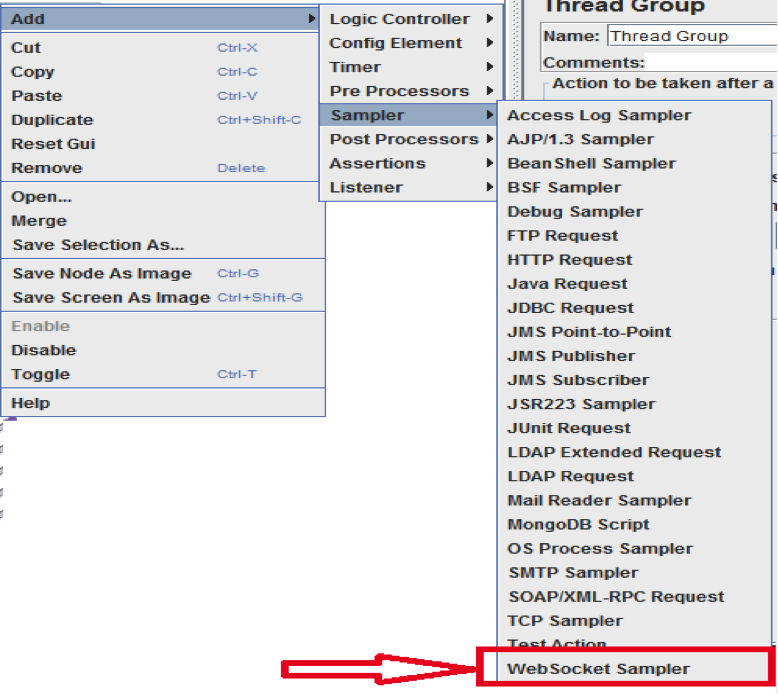
4. You can add WebSocket sampler into your test plan and configure
- We have used http://www.websocket.org/echo.html for this demo. Which uses ws://echo.websocket.org server which will respond back to the client with the same message it received.
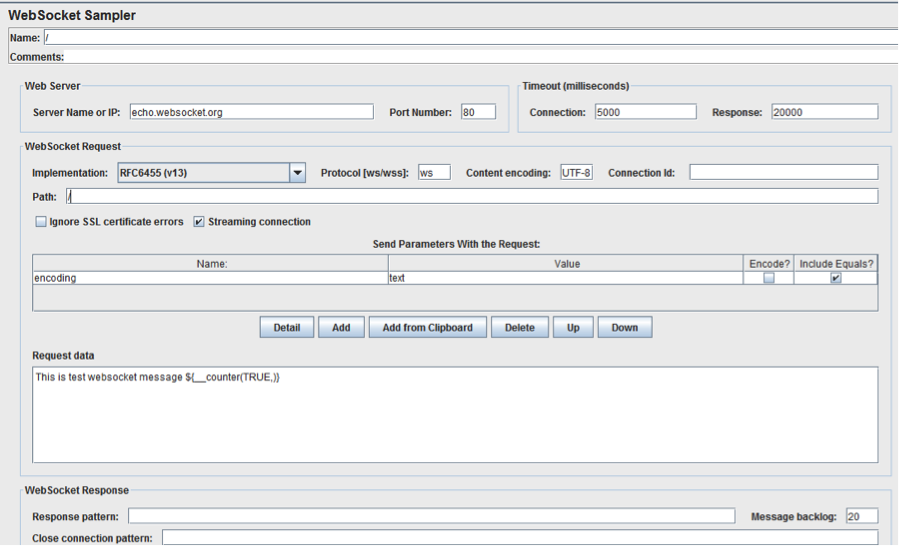
- Server Name or IP – your WebSocket server name or IP for example echo.websocket.org
- Port Number –Port that WebSocket server listens to. By default, it is 80.
- Timeout:
- Connection – maximum time in milliseconds for setting up a connection. Sampler fails if it takes longer time as specified in connection.
- Response – Maximum time in milliseconds it will wait for response message
- Implementation – Only latest version RFC6455(v13) option is available
- Protocol – Use to define WebSocket protocol to be used. “ws” prefix identifies the WebSocket connection and “wss” prefix identifies the WebSocket Secure connection
- Streaming Connection – if selected then streaming connection will remain open and is reused by subsequent requests otherwise the connection will is closed after the first response
- Request Data – Used to define outgoing messages
- Response Pattern – Sampler will wait for a response to contain the pattern defined until the defined response timeout occurs
- Message Backlog – Defines maximum count of response messages to keep
- Close Connection Pattern – Sampler will wait for a response to contain the pattern defined until defined response timeout occurs. If the pattern matches then, the connection will be closed.
- While this is available, we have not confirmed if this feature is working
5. Set the Thread/User count.
Since we have a basic echo service, we will do a small one user with a LoopController set to 100.
6. Run test locally
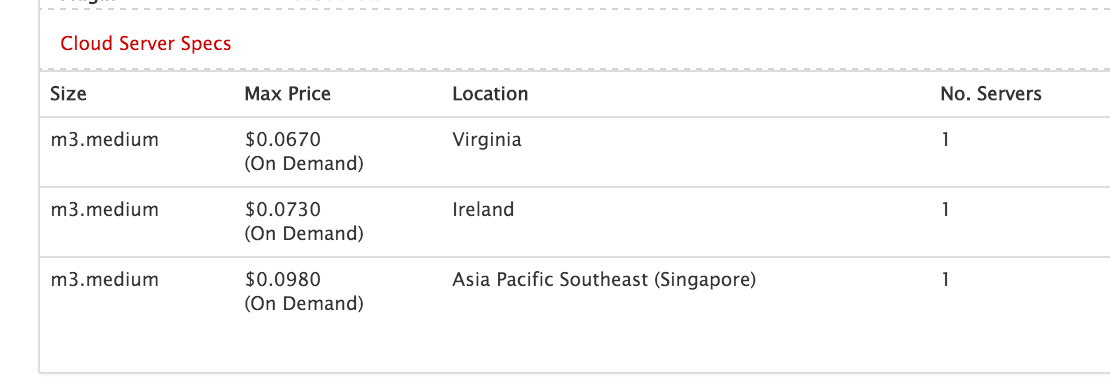
7. Run test on RedLine across multiple regions
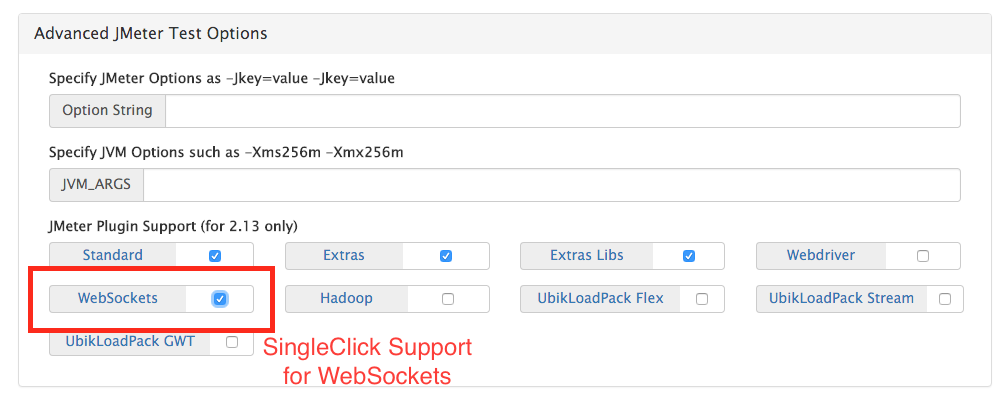
- Enabling Web Sockets: You don’t need to include all the dependencies and plugin, just use the WebSocket checkbox and we will include the dependency automatically.
- We changed some of the test parameters – 5 users, each user loop 10 times, and launch on 3 servers in different regions.
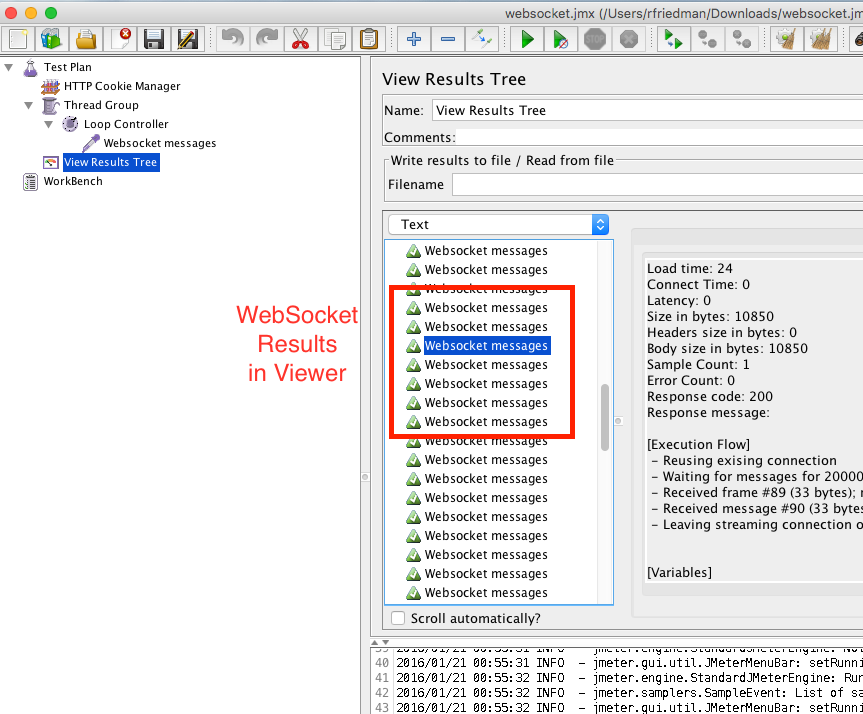
8. View Results and Download the test case
- Test Plan JMX – JMX File
- Test Page – https://www.redline13.com/share/testplan/23297